The Benefits of Quickturn PCB Prototypes
Getting a quickturn printed circuit board (PCB) prototype manufactured can provide numerous benefits during the electronics design process. Some key advantages include:
- Faster design iteration – Rather than waiting weeks or months for a standard PCB fabrication, a quickturn prototype can be produced in just a few days. This allows you to test your design, make modifications, and order another prototype in less time.
- Early validation – With a physical PCB prototype in hand early in the development cycle, you can validate the design performance, fit and function. This reduces risk and prevents costly mistakes later on.
- Accelerate time-to-market – Getting prototypes rapidly shortens the overall development timeline and allows you to bring finished products to market faster.
- Lower costs – Although quickturn fabrication has higher per-unit costs, it reduces costs overall by preventing late stage re-designs.
When to Order a Quickturn Prototype
Here are some common situations when it makes sense to get a quickturn PCB prototype:
- Testing a new circuit design idea
- Verifying layout before starting production
- Confirming design changes or revisions
- Assembling prototypes for demos and pilots
- Short runs needed faster than standard turn times
- Replacing a faulty prototype board quickly
- Field testing design performance and reliability
For complex or high value designs, the benefits of rapid prototyping usually outweigh the costs.
Choosing a Quickturn PCB Manufacturer
Selecting the right quickturn PCB manufacturer is key to getting high quality prototypes delivered fast. Here are some important factors to consider:
Turn Time
- Look for manufacturers that offer turn times of 5 days or less. Many have 2-3 day rush options.
- Ask about lead times for your location and board complexity. Priority prototyping shops can sometimes deliver in just 24-48 hours.
Location
- Use a manufacturer with a facility located near you to minimize shipping time and costs.
- For best results, select a shop located in the same country or time zone.
Order Flexibility
- Choose a company that allows ordering PCBs in small quantities, even single boards.
- Seek instant quoting and ordering to avoid delays.
- Make sure you can make fast design tweaks and do same day re-orders.
Quality & Reliability
- Verify the company has expertise in quickturn and rigorous quality control.
- Examine example boards to check quality of substrates, silkscreening, solder mask, etc.
- Avoid shops with poor customer reviews and feedback.
| Comparison of Major Quickturn PCB Manufacturers | ||||
|---|---|---|---|---|
| Company | Turn Time | Locations | Min. Order | Quality Reputation |
| PCBWay | 24 hours | China | 1 board | Excellent |
| JLCPCB | 24 hours | China | 5 boards | Very Good |
| RAYMING PCB | 48 hours | China | 1 board | Good |
| OSH Park | 3 days | USA | 3 boards | Very Good |
| Epec | 3 days | USA | No min. | Excellent |
| Advanced Circuits | 4 days | USA | No min. | Excellent |
| Sierra Circuits | 5 days | USA | No min. | Excellent |
| Hillman Curtis | 5 days | USA | No min. | Very Good |
Additional Services
Look for a manufacturer that can provide all-in-one services:
- Assembly – Get boards with components soldered
- Testing – Opt for full functional testing if needed
- Parts sourcing – Get kitted parts for DIY assembly
- Stencils – Order paste stencils for soldering SMD parts
- Design review – Verify manufacturability before ordering
- Special materials – e.g. RF materials, flex, HDI
- Certifications – ITAR, AS9100, MIL-PRF, etc.
Preparing PCB Prototype Design Files
To ensure a quick and problem-free order, it’s important to prepare design files correctly. Here are some tips:
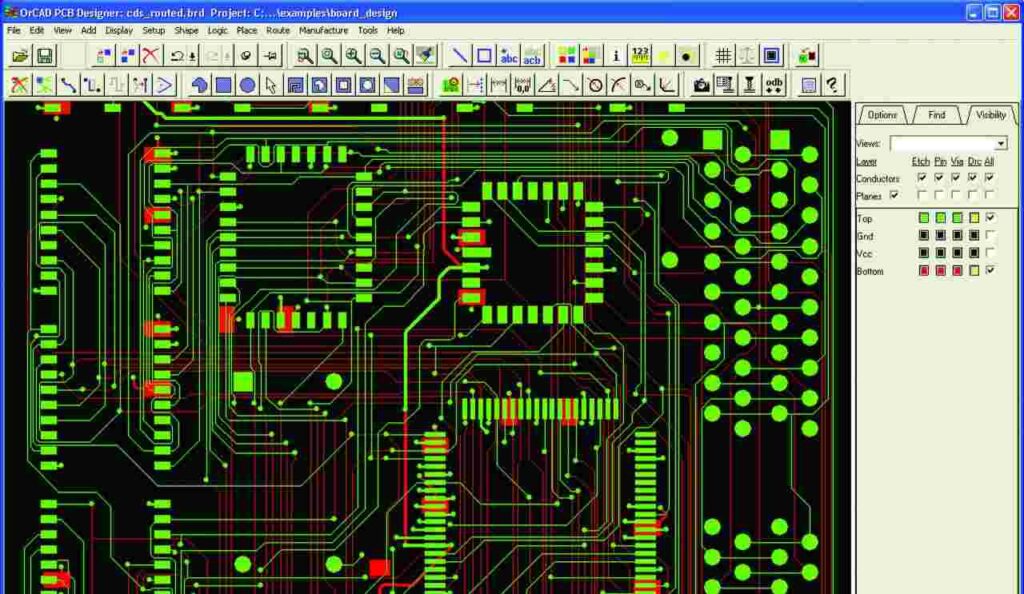
Choose the Right CAD Tool
Many PCB design tools are compatible with prototype shops, but the most popular options include:
- Altium Designer
- Cadence Allegro and OrCAD
- Mentor Graphics Xpedition
- Autodesk Eagle
- KiCad (open source)
Avoid specialty or proprietary tools that manufacturers may not support.
Include All Necessary Details
Supply all required data in your manufacturing Gerber and drill files. Here are some essentials:
- All copper layers (top, bottom, internal)
- Silkscreen layer for component markings
- Solder mask layer for insulating copper
- Drill file for holes and vias
- Netlist or bill of materials for assembly
- Board outline for cutting the PCB
- Any mechanical details – cutouts, slots, holes, etc.
Follow Design Rules and Guidelines
Adhere to your manufacturer’s design rules to avoid issues with:
- Trace/space clearances
- Minimum trace widths
- Annular rings for vias and pads
- Mask expansion rules
- Copper thickness and finished plating
Their capabilities may exceed standard rules, so confirm before assuming limitations.
Include Test Points and other Design Aids
- Add pad/via test points for probing with multimeter or oscilloscope
- Include component markings on both sides of board
- Put board ID text and polarity markers for easy assembly
- If applicable, include jig/fixture holes or edges
These features make prototype debugging and testing much easier.
Design for Manufacturability
Avoid potential fabrication problems by designing for manufacturability:
- Allow adequate clearance around board edges
- Avoid traces between closely spaced pins
- Keep high voltage and sensitive signals away from board edges
- Use surface mount devices where possible vs. through-hole
- Minimize board shapes with tight angles
Reviewing your design with the PCB manufacturer can catch issues early.
Save Gerber Files Correctly
Pay close attention when generating Gerber files to avoid common mistakes:
- Ensure all layers are output in the correct order
- Check that all copper features image properly
- Set appropriate aperture sizes for traces and pads
- Exclude all draft components, silkscreen, and dimensions
- Confirm board outline is in the right layer
Having the PCB company double check your layers is recommended.
Transmit Files Securely
- Upload your Gerber files directly to the manufacturer’s website if possible
- Compress files to ZIP or RAR if needed to reduce size
- Avoid using consumer file sharing sites like Dropbox or Google Drive
- For ITAR or other sensitive data, encrypt files and transmit securely
This protects your valuable intellectual property.
Placing Orders with Your Prototype Manufacturer
Here are some tips for smoothly ordering once you’ve chosen a PCB manufacturer:
Get an Instant Online Quote
- Use the company’s web quoting tool for upfront pricing
- Enter all required details about size, layers, quantity, time, etc.
- Check price both with and without assembly to compare
- Request additional rush or expedited services if needed
Having a live quote avoids surprise costs when ordering.
Order Directly Online
- Upload your design files and order directly on the website
- Enter payment details, preferred shipping method, etc.
- Double check the order for accuracy before submitting
- Save or print a copy of the order acknowledgment
This creates a faster and more efficient process.
Provide All Required Information
- Include all necessary Gerber files and documentation
- Fully describe any special board requirements
- Enter relevant notes for manufacturing in any comment fields
- List an accurate count of PCB quantities needed
- Specify preferred shipping carrier and account number
Missing information can delay orders and prototyping time.
Order Multiple Copies
- Start with at least 2-3 copies of initial board designs
- Order 5+ copies once design is closer to completion
- Get a few extra boards for possible reworking or damage
- Require only 1-2 boards for simple design validation
This provides boards for testing plus potential backup stock.
Confirm Order Details
- Verify all order specifics like quantity, size, layers, etc.
- Re-check the shipping address is correct
- Ensure payment method is valid before submitting
- Call manufacturer after ordering if any uncertainties
Getting order details right the first time prevents errors.
Receiving and Testing Your Prototype Boards
Once your quickturn PCB order ships, be sure to thoroughly inspect and test the boards on arrival:
Carefully Examine Boards
- Review PCBs in detail under bright lighting
- Check for any signs of physical damage in handling/shipping
- Verify boards match your design files and Gerbers perfectly
- Inspect PCB quality – mask alignment, text print, copper, etc.
- Look for any evidence of manufacturing defects or flaws
Catching defects early prevents wasting time assembling bad boards.
Functionally Test Prototypes
- Perform basic power-on and smoke tests first
- Verify key voltages, clocks, and power rails
- Load firmware/software and test progressively deeper functionality
- Run boundary tests on all major sub-systems and I/O
- Check results of any built-in self-diagnostics
Make sure your prototype actually works as designed before moving forward.
Repair Any Issues
- Fix minor physical flaws like masking drips with razor, alcohol, etc.
- Repair damaged corner, slots, or drill holes with files if possible
- If reasonably fixable, repair traces or vias with bodge wires
- For deeper issues, contact manufacturer about replacement
- Have spare boards handy in case damage is irreparable
DIY repairs can resolve some fabrication defects cost effectively.
Retain Boards with Known Issues
- Keep but set aside any prototypes with unfixable flaws
- Save these as samples for failure analysis or future reference
- Don’t assemble or use these boards further if non-functional
- Label clearly to prevent using bad boards inadvertently
These failed boards may provide clues if other issues emerge later.
Provide Feedback to Manufacturer
- Contact PCB company with feedback on quality or issues
- Send photos of any defects for their failure analysis
- Suggest improvements on any process weaknesses identified
- Provide positive feedback if boards meet or exceed expectations
Your constructive input helps them continuously improve.
Assembly, Testing and Iterating Your Prototype
Once you have prototype boards in hand, here are tips for rapid assembly, test and additional iterations:
Assemble Just a Few Boards Initially
- Hand assemble first prototype board only until design validated
- Then assemble small quantity of 2-5 boards for comprehensive testing
- Outsource assembly for larger quantities or complex designs
- Keep first board intact; use others for repairing or modifications
This incremental approach prevents wasting time and money.
Use Modular Design Techniques
- Partition complex boards into smaller sub-assemblies
- Design modules for easy assembly and configuration changes
- Create test points between module boundaries
- Standardize connectors and interfaces for module swapping
Modularity supports quickly assembling and altering prototypes.
Design for Rapid Assembly
- Lay out boards for easy hand soldering of through hole components
- Place test points and status LEDs conveniently along board edges
- Group related circuits together into functions or modules
- Clearly label components, connectors, jumpers, and switches
Well organized boards assemble faster and with fewer errors.
Verify Assembly Quality
- Closely inspect solder joints under magnification
- Reflow joints with insufficient solder
- Check for missing, misaligned or reversed components
- Verify polarized capacitors, diodes, ICs are correct
- Shake boards gently to check for loose parts
Most prototype problems start with assembly defects.
Perform Incremental Testing
- Power up gradually and test progressively from basic to complex
- Start with DC voltages, grounds, power rails, fuses, etc.
- Advance to clock inputs, reset circuits, oscillators, etc.
- Exercise digital logic, state machines, interfaces bit by bit
- Finish with full performance testing at speed, load, stress, etc.
Incremental testing quickly isolates any failures.
Modify and Iterate Faster
- Wire in patch components and links with solder or clips
- Swap ICs in sockets to test firmware or logic changes
- Adjust analog values with potentiometers and trim pots
- Use DIP switches or jumpers for digital logic modifications
- Keep replacement components handy for quick substituion
Simple mods allow rapid design tweaks between prototype turns.
Tips for Faster Prototype Turnaround
Here are some additional techniques you can use to reduce the time required for prototype turns:
Order from Local Quickturn Shops
- Use a manufacturer located in your own country or region
- Avoid overseas shops when fastest turn time is critical
- Pay extra for domestic 2-3 day priority service if needed
- Pick up prototype orders locally to avoid shipping delays
Save days versus overseas manufacturing and shipping.
Supply Design Files Upfront
- Send Gerber files to manufacturer in advance if possible
- Get feedback on any manufacturability concerns before finalizing design
- Have them do design rule checks ahead of time
- Authorize order in advance so it starts immediately upon receipt of final files
Early file transfer reduces turn time.
Pay for Expedited Services
- Take advantage of expedited turn options even if boards cost more
- For ultra-fast turns, some shops stock common materials onsite
- Pre-pay for the order to avoid any financial approval delays
- If available, pay extra fees for weekend or overtime work
These accelerate prototyping when needed to meet deadlines.
Standby for Prompt Design Mods
- Be prepared to turn revised designs fast when you receive prototypes
- Keep designers on standby to make any critical modifications
- Transmit file changes digitally to avoid physical shipping
- Pre-authorize remakes so they can start immediately if needed
No delays between receiving, revising and re-ordering.
Provide Clear Communications
- Provide accurate design requirements upfront
- Clearly explain any special prototyping needs
- Promptly respond to all manufacturer inquiries
- Give explicit feedback on any problems requiring rework
- Thank manufacturers for timely responses and efforts
Good communication reduces delays on both sides.
Conclusion
Quickturn prototyping can significantly accelerate electronics product development, while reducing project risks and costs. Choosing an experienced PCB manufacturer, carefully preparing your design files, ordering multiple copies, thoroughly testing the results, and iterating rapidly leads to the best results. With a well planned process, you can have high quality working prototypes in hand in less than a week. The ability to progress through multiple prototypes quickly let’s you perfect your design faster.
Frequently Asked Questions
Q: What is the main benefit of quickturn PCB prototyping?
A: The key advantage is the ability to quickly test new designs, make modifications, and re-test improvements in less time. Short turnaround times accelerate overall product development.
Q: What is a good turnaround time to look for?
A: For fast validation, look for manufacturers that can deliver prototype boards in 5 days or less. Two to three day turn times are ideal for urgent projects.
Q: How many prototype boards should I order initially?
A: Start with 2-3 boards first for basic validation. Order 5-10 once the design is closer to completion for comprehensive testing. Always get a few spares.
Q: Should I assemble prototypes myself or use the manufacturer?
A: For simple designs, hand assemble the first board yourself. For complex projects or higher quantities, use the manufacturer’s assembly services.
Q: What do I do if my prototype PCBs have defects?
A: Contact the manufacturer right away with feedback and photos of any significant issues. Keep flawed boards for failure analysis and re-order replacements promptly.


