Printed circuit boards (PCBs) serve as the wiring backbone interconnecting electronic components inside nearly all equipment. However, PCB assemblies operate in harsh, contaminated environments facing moisture, chemicals, vibration, dust and temperature swings threatening sensitive traces and solder joints with corrosion or electrical shorts.
Conformal coatings provide a protective barrier thinly encapsulating entire PCB assemblies to shield against environmental hazards improving product reliability and lifespan.
This guide covers using silicone, the most popular conformal coating, including properties, preparation, application techniques, challenges and inspection steps to reliably harness silicone’s protective benefits for PCBs.
Benefits of Silicone Conformal Coatings
Silicone rubber represents over 50% of all conformal coatings used on PCBs because of exceptional performance properties:
Repels Moisture – Hydrophobic silicone prevents ionizable water layer absorption and ingress into vulnerable circuitry interfaces. This mitigates corrosion risks.
Handles Extreme Temperatures – Silicones endure sustained heat up to 200°C as well as subzero cold down to -60°C making them versatile across climate conditions from deserts to the arctic.
Flexibility & Shock Absorption – The elastic silicone rubber dampens vibrations and cushions boards from mechanical damage due to drops and blows. It also relieves thermal stress from board warping.
Resists Chemicals/Solvents – Chemically inert silicones offer broad resistance to fuels, oils and cleaning agents with only a few substances like strong acids/bases degrading properties.
This unique combination of water protection, thermal stability, damping characteristics and chemical resistance makes silicone the conformal coating of choice for ruggedized PCBs facing harsh environments. Now let’s analyze necessary steps preparing for silicone application.
PCB Surface Preparation
Adequate board preparation is imperative prior to dispensing any conformal coating for maximum adhesion and performance. Steps include:
Thorough Cleaning
PCB surfaces must be completely free of grease, oil, grimy residues and especially flux which compromise coating adhesion. Clean using IPA wipedowns or aqueous batch washing systems to remove surface films under bright light inspection.
Edge Masking
Mask off board edges using specialty wafer tapes to keep coating away from connectors needing to remain exposed and electrically conductive rather than insulated. This prevents overflow coating from interfering with mating assemblies.
Surface Roughening (selectively)
Lightly abrade glossy component casing finishes using small grit sandpaper if the silicone’s primer-less adhesion seems inadequate during tests to gripped smooth plastics. Avoid damaging delicate board surfaces and traces.
Dry Baking
Bake cleaned boards for 1 hour at 80°C to drive away residual moisture clinging to surfaces which reacts with coatings during cure interfering with polymerization. Let boards fully cool down before coating.
With prep work done, next we dive into dispensing techniques guiding silicone application success.
Silicone Conformal Coating Dispensing Methods
Several methods exist to apply silicone conformal coatings offering different levels of automation scalability and thickness control:
| Dispensing Method | Description | Key Characteristics |
|---|---|---|
| Manual Brushing | Using disposable chip brushes to sweep coating across boards | Simple <br> Inconsistent thickness <br> Labor intensive |
| Spray Coating | Pressurized nozzles spray atomized droplets of silicone | Flexible area selectivity <br> Overspray risks <br> Lower thickness range 0-50 microns |
| Selective Dipping | Controlled equipment dipping/withdrawing speeds govern coating thickness | Consistent thickness up to 150 microns <br> Limited to board edges |
| Automated Dispensers | Software driven robotic nozzles jet patterns across boards | Repeatable, programmable <br> High upfront cost |
Let’s analyze key considerations when applying silicone coatings using either manual brushing or automated dispensing systems.
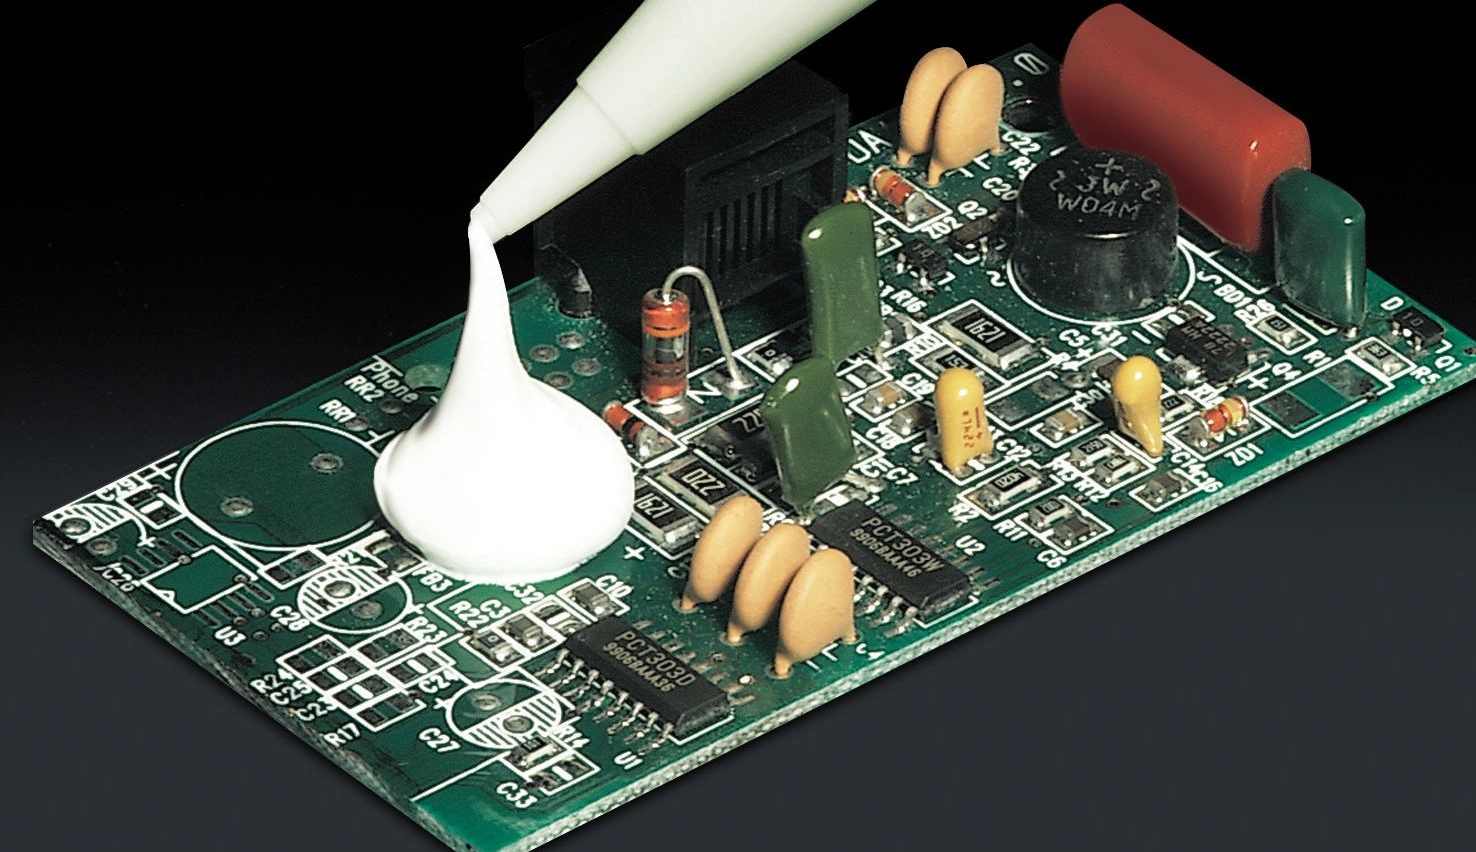
Manual Brushing Technique
Though labor intensive at production volumes, hand brushing enables great selectivity manually controlling coverage areas across complex, densely packed boards where programmatic systems struggle reaching inside tight spaces.
Tips for manual brushing include:
- Light sweeps accumulation coating thickness. Apply 1-2 thin layers for 25 microns total.
- Ensure complete wetting uniformly across all intended areas without gaps or pinholes.
- Strictly avoid pooling into thick puddles exceeding 50 microns causing prolonged cure times and dielectric breakdown risks.
- Alternate brushing direction between layers hits all areas.
- Have clean foam swabs ready removing accidental brush drips.
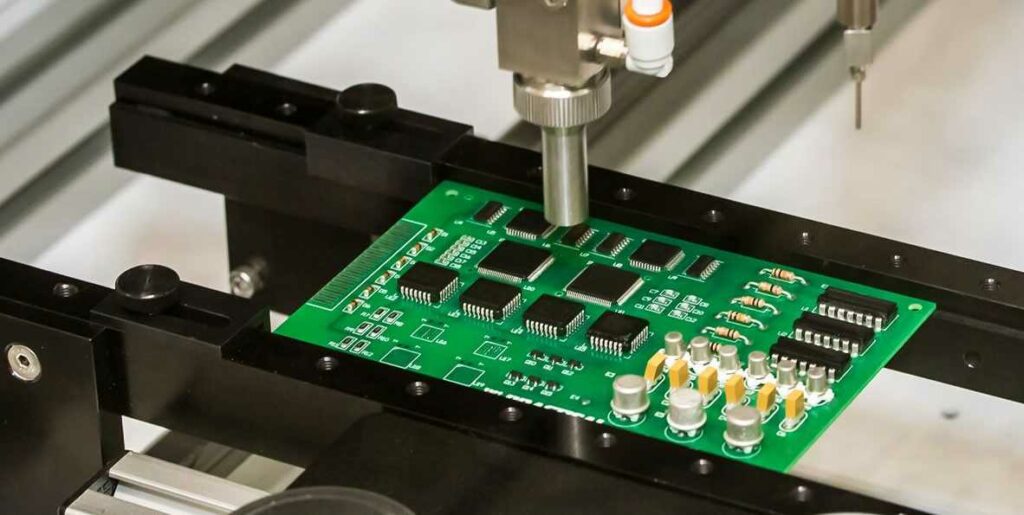
Automated Dispensing Strategy
Automated jet valve/needle dispensing systems offer hands-free coating reproducibility once programmed correctly using CAD PCB data:
Programming guidelines include:
- Importing board geometry to map all areas needing coat coverage comprehensively.
- Choosing circular spray patterns for more uniform surface wetting rather than single line passes.
- Optimizing height offset, flow rate, speed and nozzle gauge for targeted coating thickness based on iterations.
- Adding interlayer drying pauses to prevent overlay drips while wet.
- Inputting surface mount location exclusions to select between components judiciously.
- Incorporating post-process closed-loop inspection feedback to refine programming further.
- Backfilling any observed holiday voids with targeted manual touchup.
Both manual and automated silicone dispensing require empirical process refinement to achieve protection without electrical insulation or masking issues. Now we’ll cover coating inspection.
Inspecting Silicone Coating Quality

Carefully verifying conformal coating performance proves critical before relying on expected protection levels in deployed conditions:
Coating Coverage Integrity
Visually inspect under bright adjustable raking light at multiple angles to check for any missed spots or thin patches allowing moisture ingress points. Use magnifying glasses checking between dense components.
Coating Thickness
Sample thickness across various board geometries using either laser triangulation sensors or mechanical depth pin micrometers accurate to 1-2 microns resolution. Look for 25-75 micron nominal thickness without exceeding 100 microns.
Continuity Testing
Probe electrical continuity arbitrarily across various coated conductor interfaces using a multimeter to detect any inadvertent connections caused by coating electrically shorting together adjacent exposed conductors not intended to connect.
Adhesion Testing
Slice an X-cut or Y-cut into the dried coating film using a fresh utility blade, then apply standardized 90 or 180 degree peel test tape pressed firmly into the cuts. Rapidly peel off tape looking for discoloration/coating removal at cut interfaces signaling adhesion loss.
Catching coating defects using quantitative inspections prevents downstream production issues or inadequate protection levels once instruments get fielded allowing only sound units shipping.
Next we’ll discuss some potential application challenges requiring awareness.
Troubleshooting Silicone Conformal Coating Issues
Like any multistep production process, opportunities exist for silicone coating pitfalls jeopardizing PCB protection:
Shadowing Under Components – Dense board geometries cause shaded “holidays” lacking coating underneath tall components. This demands carefully angled manual touchup brushing.
Solvent Entrapment – Cleaning process residuals trapped underneath surface mount parts get uncovered during rework outgassing later forming bubble/crack failure points.
Cure Inhibition – Some contaminants left from flux or skin oils inhibit silicone curing voltage affecting properties. Ensure chemically clean surfaces.
Excess Drips Around Edges – Overapplying coats allows gravity drips building up on bottom board edges interfering with fit tolerances inside enclosures.
Masking Adhesion Failures – Improperly applying specialty tapes masking connectors leads to bleed underneath failures when peel tested. Utilize adhesive primers to stick reliably.
Avoiding these typical pitfalls through controls awareness and inspection rigor ensures coatings deliver their maximum protective value securing electronics reliability.
Now we’ll wrap up answering some common FAQs around the topic.
Frequently Asked Silicone Coating Questions

Does conformal coating increase the risk of tin whiskers causing shorts?
Tin whiskers represent small conductive crystal structures sprouting unpredictably over time which can bridge gaps causing shorts. However research shows most silicone and acrylic coatings significantly retard whisker formation relative to uncoated tin surfaces when applied correctly. So conformal coatings actually mitigate rather than increase shorting risks overall.
How thick should silicone coatings be for ruggedized outdoor electronics?
For unconditioned PCBs facing temperature swings, constant humidity, chemical fumes or abrasive dirt exposures demanding maximum insulation, apply silicone coatings between 75-100 microns to ensure sufficient protection margins. Harsher expected conditions warrant thicker films on the higher end.
Is silicone coating compatible with my particular plastic enclosure/front panel?
Always check silicone conformal coating product datasheets for chemical compatibility listings against various plastics used inside instruments like ABS, PEEK, nylon, etc. Also test empirically first for unexpected reactions discoloring, distorting or damaging components to confirm non-reactivity fully before committing to production.
Can conformal coatings be removed later to access PCBs without damage?
Yes, specialty silicone coating removal sprays based on solvents like acetone or d-limonene work well dissolving away coatings for rework access without hurting boards when sprayed from 6+ inches distance. Ensure to mask nearby components not needing exposure. Reflow any disturbed solder joints then replace the silicone coating after concluding hardware fixes.
How long does silicone coating protective effects last before needing reapplication?
When applied appropriately at thickness exceeding 50 microns across entire board assemblies without gaps, silicone coatings reliably shield electronics from condensation, grime, vibration and chemical ingress hazards for approximately 3-5 years before wear effects like thin spots or cracking merit protective renewal to continue preserving hardware functionality indefinitely.
Conclusion
In summary, silicone rubber conformal coatings play an indispensable role protecting PCB assemblies from the harmful effects of liquids, vibration, debris and temperature extremes that commonly break down electronics prematurely. When uniformly applied across properly-prepared boards within targeted thickness ranges between 25-100 microns following automated or manual dispensing best practices – then subsequently inspected for thorough coverage, continuity, adhesion and thickness – silicone coatings extend electronics lifespan and field reliability by years cost-effectively. Understanding suitable dispensing methods, troubleshooting defects and validating protection levels empowers electronics manufacturers to maximize the substantial benefits of conformal coatings across the entire product line.


