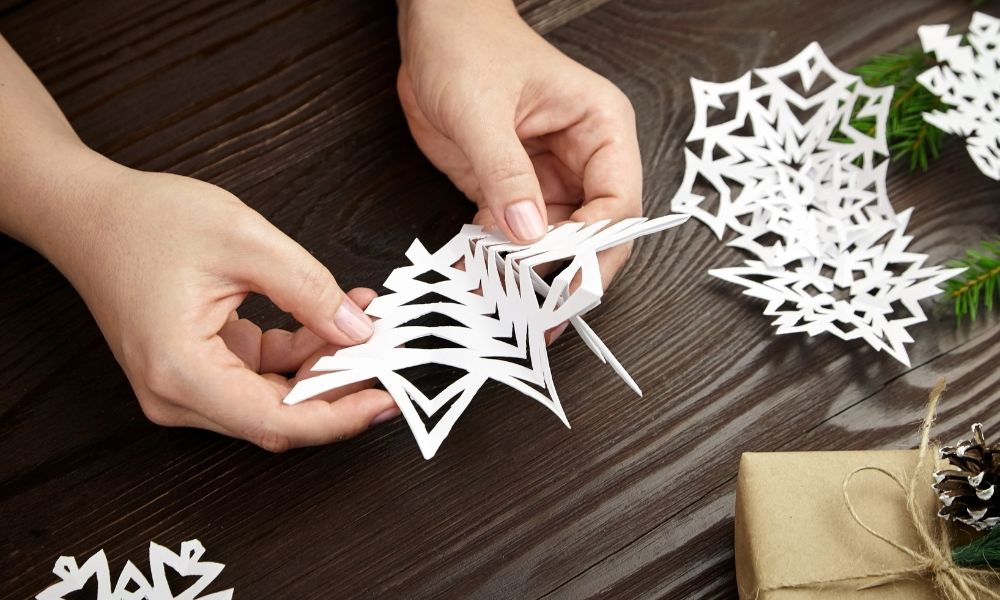
Making paper snowflakes is a fun and easy way to add a festive touch to any holiday decor. While traditional flat paper snowflakes are a classic craft, 3D paper snowflakes take it to the next level. These beautiful decorations can be made in a variety of sizes and colors and can be hung from the ceiling, placed on a mantel, or used as a centerpiece.
Creating a 3D paper snowflake may seem daunting, but it is actually quite simple. All you need is paper, scissors, and glue. There are several methods to make a 3D paper snowflake, including folding and cutting squares of paper, or using a template to cut out intricate designs. Once you have the basic shape, you can add layers and embellishments to create a unique and stunning snowflake. With a little patience and creativity, you can make a beautiful 3D paper snowflake that will impress your friends and family.
Materials Needed
To make 3D paper snowflakes, you will need a few materials that are easy to find and inexpensive. Here’s what you’ll need:
Paper
The first thing you’ll need is paper. You can use any type of paper you like, but it’s best to use white paper, as it will give your snowflakes a classic look. Printer paper or construction paper works well, but you can also use scrapbook paper or even recycled paper. The important thing is that the paper is sturdy enough to hold its shape when folded and cut.
Scissors
Scissors are essential for cutting the paper into the right shapes. You’ll need a pair of sharp scissors that can cut through paper easily. If you want to make intricate designs, you might want to invest in a pair of small, sharp scissors that are designed for paper cutting.
Pencil
A pencil is useful for drawing your design onto the paper before you start cutting. You can use any type of pencil, but it’s best to use a sharp one that will make clear, precise lines.
Ruler
A ruler is helpful for measuring and marking the paper before you start cutting. You can use any type of ruler, but a clear plastic one is best, as it will allow you to see the paper underneath.
Glue or Tape
Glue or tape is needed to hold the different parts of the snowflake together. You can use any type of glue or tape, but it’s best to use a clear, strong adhesive that won’t show up on the finished snowflake.
Optional Materials
If you want to hang your snowflakes, you’ll need some fishing line or thin string. You might also want to use a bone folder or scoring tool to make crisp folds in the paper. And if you want to add some sparkle to your snowflakes, you can use glitter or sequins.
Preparing the Paper
Before you start making your 3D paper snowflakes, you need to prepare your paper. Here are the steps you need to follow:
Cutting the Paper into Squares
First, you need to cut your paper into squares. You can use any type of paper you like, but we recommend using plain white printer paper for best results. You can also use colored paper or patterned paper for a more festive look.
To cut the paper into squares, follow these steps:
- Fold a sheet of paper in half diagonally to form a triangle.
- Cut off the excess paper at the bottom to create a square.
- Unfold the paper and repeat the process with the remaining sheets of paper until you have as many squares as you need.
Choosing the Right Size
The size of your paper squares will determine the size of your finished snowflake. Generally, the larger the squares, the larger the snowflake. However, larger squares can also be more difficult to work with, especially if you’re a beginner.
We recommend starting with 6-inch squares for your first few snowflakes. Once you get the hang of it, you can experiment with larger or smaller squares to create different sizes of snowflakes.
Using Decorative Paper
If you want to add some extra flair to your snowflakes, you can use decorative paper instead of plain white printer paper. Some good options include:
- Patterned scrapbook paper
- Origami paper
- Metallic paper
- Tissue paper
Keep in mind that thicker paper can be more difficult to fold and cut, so you may need to adjust your technique accordingly.
By following these steps, you can prepare your paper for making beautiful 3D paper snowflakes.
Creating the Basic Snowflake
To create a 3D paper snowflake, you’ll need to start with a basic snowflake shape. Here is a step-by-step guide to help you create a basic snowflake.
Folding the Paper
- Start with a square piece of paper.
- Fold the paper in half diagonally to create a triangle.
- Fold the triangle in half again to create a smaller triangle.
- Fold the paper in thirds, making sure the edges line up perfectly.
Cutting the Paper
- Use scissors to cut six slits along any one of the open sides.
- Be careful not to cut the whole slit into a strip. Keep a cm of the folded paper’s closed-end intact.
- Repeat the same process for the other five sides.
Once you have created the basic snowflake, you can start to add depth and dimension to it by folding and cutting the paper in different ways. Experiment with different shapes and sizes to create a unique 3D snowflake.
Remember to take your time and be patient when creating your snowflake. It may take a few tries to get it just right, but the end result will be worth it.
Making the Snowflake 3D
To make a 3D paper snowflake, you will need to add layers of paper and attach them together. Here are the steps to create a beautiful 3D paper snowflake:
Adding Layers of Paper
- Start with a square piece of paper. You can use any color or patterned paper for this project.
- Fold the paper in half diagonally to create a triangle.
- Fold the triangle in half again to make a smaller triangle.
- Fold the paper in thirds, bringing one corner of the triangle to the center of the opposite side.
- Repeat the previous step with the other corner of the triangle.
- Flip over the paper and fold the two corners to the center.
- Repeat the previous step with the other two corners.
- You should now have a hexagon shape with six flaps.
Attaching the Layers
- Cut out small triangles on each side of the folded paper, making sure to leave a small uncut strip in the center.
- Unfold the paper and gently push the center of the snowflake outwards to create the 3D effect.
- Repeat the previous steps to create additional layers of paper.
- Attach the layers together using clear tape or glue.
- Start with the largest layer and work your way up to the smallest layer.
- Attach the layers in the center of the snowflake.
- Once all layers are attached, gently bend the edges of the snowflake upwards to create a 3D shape.
By following these simple steps, you can create a beautiful 3D paper snowflake that will impress your friends and family. With a little practice, you can experiment with different colors and patterns to create unique and stunning snowflakes.
Customizing Your Snowflake
Once you’ve mastered the basics of making a 3D paper snowflake, it’s time to get creative and customize your designs. Here are some ideas for cutting different shapes and adding color to make your snowflakes truly unique.
Cutting Different Shapes
Instead of the traditional triangular shapes, try cutting out different shapes to create a more intricate snowflake. Here are some ideas:
- Hearts: Fold your paper in half and cut out half a heart shape along the folded edge. When you unfold the paper, you’ll have a heart-shaped cutout in the center of your snowflake.
- Stars: Fold your paper in half and cut out a star shape along the folded edge. When you unfold the paper, you’ll have a star-shaped cutout in the center of your snowflake.
- Circles: Fold your paper in half and cut out a circle shape along the folded edge. When you unfold the paper, you’ll have a circular cutout in the center of your snowflake.
Adding Color
To add some color to your snowflakes, you can use colored paper or paint your finished snowflakes. Here are some ideas:
- Watercolor: Paint your finished snowflakes with watercolors to create a soft, dreamy effect.
- Acrylic paint: Use acrylic paint to create bold, vibrant snowflakes.
- Glitter: Add some sparkle to your snowflakes by sprinkling glitter on them while the paint is still wet.
You can also experiment with different color combinations and patterns. For example, you could paint each layer of your snowflake a different color, or use a gradient of colors to create an ombre effect.
Remember, the possibilities are endless when it comes to customizing your 3D paper snowflakes. Have fun and let your creativity run wild!
Conclusion
In conclusion, making 3D paper snowflakes is a fun and creative activity that can be enjoyed by people of all ages. With a little practice and patience, you can create beautiful and unique snowflakes that will add a touch of winter wonderland to your home.
Throughout this article, we have explored different techniques and tips for making 3D paper snowflakes. We learned how to fold a square piece of paper to create the base of the snowflake, how to cut out intricate designs, and how to glue the pieces together to form the final 3D shape.
One important thing to keep in mind when making 3D paper snowflakes is to take your time and be precise. Sharp scissors, a bone folder, and a flat surface can all help you achieve clean and accurate cuts and folds. It’s also important to experiment with different sizes and shapes of paper to create a variety of snowflakes.
Whether you’re looking for a fun winter craft to do with your kids or a creative way to decorate your home for the holidays, making 3D paper snowflakes is a great choice. With a little bit of creativity and imagination, you can create beautiful and unique snowflakes that will impress everyone who sees them. So grab some paper, scissors, and glue, and let your creativity soar!
Resouces:
https://www.firstpalette.com/craft/3d-paper-snowflake.html
https://www.wikihow.com/Make-a-3D-Paper-Snowflake
https://www.thecraftaholicwitch.com/3d-paper-snowflakes/
https://craftboxgirls.com/blogs/articles/diy-3d-paper-snowflakes


