3D printing has become a popular hobby and profession in recent years. Whether you are a professional designer or just someone who wants to create something unique, 3D printing can be a great way to bring your ideas to life. However, before you can start printing, you need to create a 3D model that can be printed. In this article, we will show you how to make 3D models for printing.
The first thing you need to do is choose a 3D modeling software. There are many options available, both free and paid. Some popular free options include Tinkercad, Blender, and SketchUp. Once you have chosen your software, you can start creating your model. It is important to keep in mind that the model needs to be printable, so you need to pay attention to certain guidelines, such as avoiding steep overhangs and considering layer line direction for stronger prints.
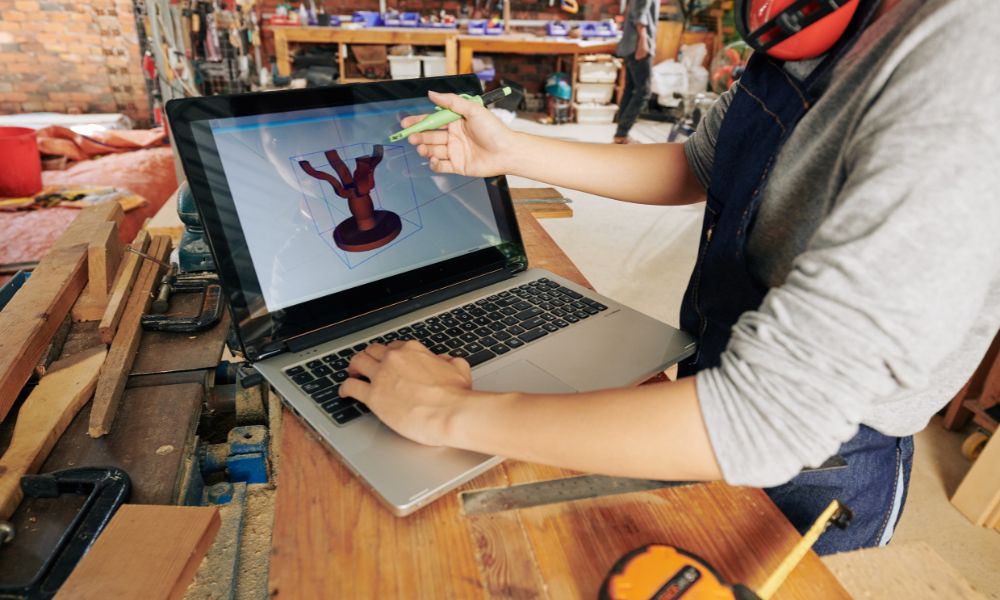
After you have finished creating your model, you need to slice it using a slicer software. This software will convert your model into a format that can be printed by your 3D printer. Some popular slicer software options include Cura, PrusaSlicer, and Simplify3D. Once you have sliced your model, you can save it to an SD card or use Octoprint as an alternative. With these steps, you can create a 3D model that is ready to be printed.
Choosing a 3D Modeling Software
When it comes to choosing a 3D modeling software for 3D printing, there are several factors to consider. In this section, we’ll discuss some of the considerations you should keep in mind when choosing software, as well as some recommended options for beginners and more advanced users.
Considerations for Choosing Software
- Ease of use: If you’re new to 3D modeling, you’ll want to choose a software that is easy to use and has a user-friendly interface. Look for software that has tutorials and other resources available to help you get started.
- Compatibility: Make sure the software you choose is compatible with your computer and with the file formats you’ll be using for 3D printing.
- Features: Consider the features you’ll need for your specific 3D printing projects. Some software may offer more advanced features that you won’t need as a beginner, while others may be too basic for more complex projects.
- Cost: Some 3D modeling software can be quite expensive, while others are free or offer affordable pricing options. Consider your budget when choosing software.
Recommended Software for Beginners
If you’re new to 3D modeling, there are several software options that are great for beginners:
- Tinkercad: Tinkercad is a free, browser-based 3D modeling software that is easy to use and perfect for beginners. It offers a variety of shapes and tools for creating 3D models, and has a large community of users who share their designs and offer support.
- SketchUp Free: SketchUp Free is another free, browser-based 3D modeling software that is great for beginners. It offers a simple interface and a variety of tools for creating 3D models.
- Blender: While Blender is a more advanced software, it is also a great option for beginners who want to learn more advanced 3D modeling techniques. It is free, open-source, and has a large community of users who offer support and resources.
Advanced Software Options
If you’re an experienced 3D modeler or want to take your skills to the next level, there are several advanced software options to consider:
- Autodesk Fusion 360: Autodesk Fusion 360 is a professional-grade 3D modeling software that offers advanced features for creating complex 3D models. It is a subscription-based software with a free trial available.
- SolidWorks: SolidWorks is another professional-grade 3D modeling software that is widely used in the engineering and design industries. It offers advanced features for creating complex 3D models, but can be quite expensive.
- ZBrush: ZBrush is a digital sculpting software that is used for creating highly detailed 3D models. It is a more specialized software, but is widely used in the film and gaming industries. It can be quite expensive, but offers a free trial.
Creating a 3D Model
Creating a 3D model is the first step towards 3D printing. There are various 3D modeling software available, ranging from beginner-friendly to professional grade. In this section, we will discuss some basic and advanced 3D modeling techniques.
Basic 3D Modeling Techniques
The following are some basic 3D modeling techniques that can be used to create simple 3D models:
- Extruding: This is the process of pulling a 2D shape into a 3D object. It is a simple technique that is used to create basic shapes such as cubes, cylinders, and spheres.
- Scaling: This is the process of resizing a 3D object. It is useful when you need to change the size of an object or when you want to create a variation of an existing model.
- Rotating: This is the process of turning a 3D object around an axis. It is useful when you want to create symmetrical objects or when you need to adjust the orientation of an object.
- Boolean Operations: This is the process of combining two or more objects to create a new object. It is useful when you need to create complex shapes or when you need to cut a hole in an object.
Advanced 3D Modeling Techniques
The following are some advanced 3D modeling techniques that can be used to create complex 3D models:
- Sculpting: This is the process of creating 3D models by manipulating a digital material as if it were clay. It is useful when you need to create organic shapes or when you want to add fine details to an object.
- Mesh Modeling: This is the process of creating 3D models by manipulating the vertices, edges, and faces of a mesh. It is useful when you need to create complex shapes or when you need to create models for animation or gaming.
- Parametric Modeling: This is the process of creating 3D models using mathematical equations. It is useful when you need to create precise models that can be easily modified.
In conclusion, creating a 3D model requires a good understanding of the 3D modeling software and the techniques used to create 3D models. By using the basic and advanced 3D modeling techniques discussed in this section, you can create simple and complex 3D models that can be 3D printed.
Preparing the Model for Printing
Before sending your model to the 3D printer, it’s crucial to prepare it properly. This will ensure that the final product meets your expectations and is printable without issues. In this section, we’ll cover two essential steps in preparing the model for 3D printing: checking for errors and making the model printable.
Checking for Errors
Before printing, it’s essential to check your 3D model for errors. Even small mistakes can result in a failed print or a less-than-perfect final product. Here are some common errors to look out for:
- Non-manifold geometry: This occurs when the model has intersecting faces or edges, causing issues with the slicing process.
- Holes or gaps: These can cause issues with the structural integrity of the final product.
- Overhangs: Overhangs that are too steep can cause the print to fail or result in a poor-quality final product.
To check for errors, use a 3D modeling software that has a built-in error-checking tool. Many 3D modeling software programs have plugins or extensions that can help identify and fix errors.
Making the Model Printable
Once you’ve checked for errors, it’s time to make the model printable. Here are some steps to follow:
- Scale the model: Scale the model to the desired size, keeping in mind the limitations of your 3D printer.
- Orient the model: Orient the model in a way that minimizes overhangs and maximizes stability.
- Add support structures: Add support structures to the model to prevent overhangs and ensure stability during printing. Most 3D modeling software programs have built-in support structure tools.
- Hollow the model: If the model is too heavy or requires a lot of material, consider hollowing it out to reduce printing time and material usage.
Once you’ve completed these steps, export the model in a format that’s compatible with your 3D printer, such as an STL file. Then, load the file into your 3D printer software and prepare it for printing.
In summary, preparing your model for 3D printing involves checking for errors and making the model printable. By following these steps, you can ensure that your final product meets your expectations and is printable without issues.
Exporting the Model for Printing
Once you have created a 3D model in your preferred software, it’s time to export it in a format that is compatible with your 3D printer. In this section, we will discuss the file formats for 3D printing and how to slice the model for printing.
File Formats for 3D Printing
The most common file format for 3D printing is STL (Standard Triangle Language). This format is widely supported by 3D printers and slicing software. When exporting your model as an STL file, make sure it is watertight and manifold. This means that the model is a closed mesh with no holes or gaps, and all surfaces are facing the correct direction. Some software may have built-in tools to check and repair the model before exporting.
Other file formats that are compatible with 3D printing include OBJ, AMF, and 3MF. However, not all 3D printers and slicing software support these formats, so it’s best to check the compatibility before exporting.
Slicing the Model
Before printing, the 3D model needs to be sliced into layers, which is done by slicing software. The slicing software takes the 3D model and generates instructions for the 3D printer on how to print each layer. When slicing the model, you can adjust settings such as layer height, infill density, and support structures.
When exporting the model as an STL file, make sure to include any necessary supports. Supports are structures that are added to the model to prevent overhangs and ensure that the model prints correctly. Some slicing software may have built-in support generation, while others may require manual support placement.
Once the model is sliced, the resulting file is usually in G-code format, which is a set of instructions that the 3D printer understands. This file can then be transferred to the 3D printer for printing.
In conclusion, exporting a 3D model for printing involves ensuring that the model is in a compatible file format and slicing it into layers with the necessary supports. By following these steps, you can ensure that your 3D model prints correctly and accurately.
Printing the Model
Once the 3D model is ready, it’s time to print it. Here are the steps to follow:
Choosing a 3D Printer
Before printing the model, you need to choose a 3D printer that suits your needs. There are various types of 3D printers available in the market, ranging from affordable desktop printers to high-end industrial-grade printers.
Consider the following factors when choosing a 3D printer:
- Build volume: The size of the printer’s build platform determines the maximum size of the model that can be printed.
- Print quality: Look for a printer that can produce high-quality prints with fine details.
- Filament compatibility: Make sure the printer is compatible with the type of filament you will be using.
- Price: Consider your budget and choose a printer that offers the best value for money.
Preparing the Printer
Once you have chosen a printer, you need to prepare it for printing. Here are the steps to follow:
- Level the print bed: A level print bed ensures that the first layer of the print adheres properly to the bed.
- Load the filament: Load the filament into the printer’s extruder according to the manufacturer’s instructions.
- Set the temperature: Set the temperature of the extruder and the bed according to the filament’s requirements.
- Calibrate the printer: Calibrate the printer to ensure that the print head moves accurately and the prints are dimensionally accurate.
Printing the Model
Now that the printer is ready, it’s time to print the model. Here are the steps to follow:
- Slice the model: Use a slicing software to convert the 3D model into G-code, which is the language that the printer understands.
- Save the G-code to an SD card: Save the G-code file to an SD card and insert it into the printer.
- Start the print: Start the print and monitor it closely to ensure that everything is going smoothly.
- Post-processing: Once the print is complete, remove the model from the print bed and do any necessary post-processing, such as sanding or painting.
By following these steps, you can print your 3D model with ease and precision.
Post-Printing
Once your 3D print is complete, there are a few things you need to do to make sure it looks its best. Post-processing can help improve the strength and finish of your print. This section will cover two important sub-sections: Removing Supports and Rafts and Finishing Techniques.
Removing Supports and Rafts
When you print a 3D model, you may need to add supports and rafts to ensure the print is successful. Supports are structures that hold up overhanging parts of the print, while rafts are layers of material that help the print stick to the build plate. Once the print is complete, you will need to remove these structures.
To remove supports, you can use a pair of pliers or cutters to snap them off. Be careful not to damage the print while doing this. For rafts, you can use a scraper or spatula to gently lift and remove them from the print. If the raft is stuck too firmly, you may need to use a knife or sandpaper to remove it.
Finishing Techniques
There are several finishing techniques you can use to give your 3D print a professional look. Here are a few options:
- Sanding: Use sandpaper to smooth out rough edges and surfaces on your print.
- Painting: Apply paint to your print to give it a customized look. You can use spray paint or acrylic paint, depending on the material of your print.
- Polishing: Use a polishing compound to give your print a shiny finish. This works well for prints made from materials like PLA.
- Coating: Apply a clear coat to your print to protect it from damage and give it a glossy finish.
Keep in mind that the finishing techniques you use will depend on the material of your print and the look you are going for. Experiment with different techniques to find the one that works best for you.
In conclusion, post-processing is an important step in 3D printing that can help improve the strength and finish of your print. Removing supports and rafts and using finishing techniques are two key ways to achieve a professional-looking print.
Conclusion
In conclusion, creating 3D models for printing requires a combination of creativity, technical skills, and attention to detail. Whether you are a professional designer or a hobbyist, there are several steps you can follow to ensure your models are optimized for printing.
First, it is important to choose the right software for your needs. There are many options available, ranging from free open-source programs to high-end commercial software. Some popular choices include Blender, SketchUp, and Autodesk Fusion 360.
Once you have selected your software, it is important to learn the basics of 3D modeling. This includes understanding concepts such as geometry, topology, and mesh optimization. You can find many online tutorials and courses that can help you improve your skills.
When designing your model, it is important to keep in mind the limitations of the printing process. This includes factors such as the size of the printer, the resolution of the printer, and the materials being used. You should also consider the orientation of the model, as well as any supports or rafts that may be required.
Finally, once your model is complete, it is important to prepare it for printing. This includes tasks such as slicing the model into layers, generating support structures, and exporting the file in the correct format. You can use software such as Ultimaker Cura or PrusaSlicer to help you with these tasks.
By following these steps, you can create high-quality 3D models that are optimized for printing. Whether you are creating prototypes, toys, or works of art, 3D printing technology provides endless possibilities for bringing your ideas to life.
https://www.wevolver.com/article/how-to-make-a-3d-model-for-printing
How to create Models for 3D Printing (STL Files): Full Guide!
https://3dprinterly.com/how-do-you-make-3d-printer-files-step-by-step-guide-with-visuals/
https://help.prusa3d.com/article/creating-your-own-3d-models_2209