Introduction
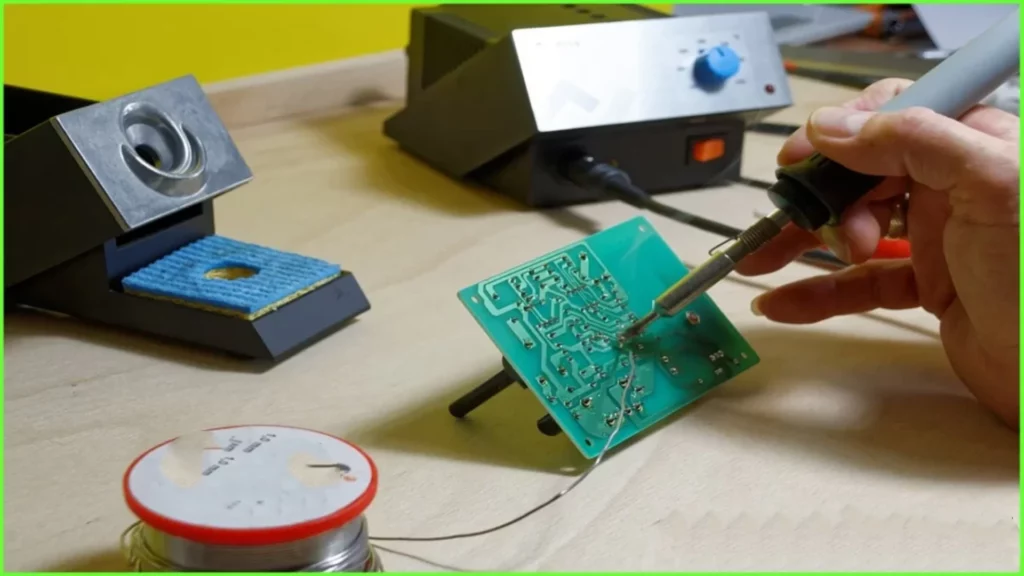
Soldering is an essential skill for anyone interested in electronics, DIY projects, or hobby circuits. It involves the process of joining two or more metal components together using a molten filler metal called solder. While it may seem daunting at first, with the right tools, materials, and techniques, circuit board soldering can be a straightforward and rewarding task to learn.
This comprehensive tutorial aims to guide you through the entire process of soldering electronic components onto circuit boards. Whether you’re a beginner or looking to refine your skills, this article will cover everything from setting up your workspace to troubleshooting common soldering issues.
Workspace Setup
Before you begin soldering, it’s crucial to have a dedicated workspace that is well-organized, well-ventilated, and free from clutter. Here’s what you’ll need:
Tools and Materials
- Soldering Iron
- Choose a soldering iron with a temperature range of 600°F to 800°F (315°C to 427°C) and a chisel or conical tip.
- Consider investing in a temperature-controlled soldering iron for better heat management.
- Solder
- Use lead-free solder with a rosin core, typically 63/37 or 60/40 tin/lead composition.
- Thinner solder (0.032 inches or 0.8 mm) is easier to work with for beginners.
- Flux
- Flux helps the solder flow smoothly and prevents oxidation.
- You can use a separate flux pen or choose solder with a rosin core.
- Flush Cutters or Diagonal Pliers
- Use these to trim excess component leads after soldering.
- Desoldering Braid or Solder Sucker
- Essential for removing excess solder or correcting mistakes.
- Damp Sponge
- Keep a clean, damp sponge nearby to clean the soldering iron tip.
- Safety Equipment
- Wear safety glasses to protect your eyes from solder splashes.
- Use a well-ventilated area or a fume extractor to remove smoke and fumes.
- Workbench or Heat-Resistant Surface
- Protect your work surface with a silicone mat or heat-resistant pad.
- Adequate Lighting
- Ensure your workspace is well-lit to see the components and solder joints clearly.
Workspace Organization
- Keep your tools within easy reach, but away from the soldering area to prevent accidental burns or spills.
- Use an anti-static mat or grounded surface to protect sensitive electronic components from static discharge.
- Have a trash can or container nearby to dispose of used solder wick, component leads, and other waste.
Soldering Technique

Proper soldering technique is crucial for creating strong, reliable connections. Follow these steps:
- Tin the Soldering Iron Tip
- Heat the soldering iron and apply a small amount of solder to the tip.
- This process, known as “tinning,” helps transfer heat efficiently and prevents oxidation.
- Prepare the Components
- Bend the component leads at a 90-degree angle to fit through the circuit board holes.
- If necessary, use flux to clean the component leads and circuit board pads.
- Insert the Components
- Carefully insert the component leads into the designated holes on the circuit board.
- Ensure the component is seated correctly and flush against the board.
- Apply Solder
- Heat the component lead and circuit board pad simultaneously with the soldering iron tip.
- Apply a small amount of solder to the heated area, allowing it to flow around the lead and pad.
- Avoid applying too much solder, as it can create a messy joint or bridging between adjacent pads.
- Let the Joint Cool
- Remove the soldering iron and allow the joint to cool without disturbing it.
- A properly soldered joint should have a smooth, concave appearance known as a “solder fillet.”
- Trim Excess Leads
- Once the solder has cooled, use flush cutters or diagonal pliers to trim any excess component leads close to the solder joint.
- Inspect and Clean
- Visually inspect each solder joint for proper wetting, shape, and potential bridges or cold joints.
- Use a damp sponge or brass sponge to clean the soldering iron tip after each joint.
Desoldering and Rework
Mistakes happen, and sometimes you may need to remove or replace a component. Here’s how to desolder and rework your circuit board:
- Desoldering
- Use a desoldering braid or solder sucker to remove excess solder from the joint.
- Apply the soldering iron tip to the joint and allow the solder to melt.
- Quickly remove the molten solder with the desoldering tool.
- Component Removal
- Once the solder is removed, gently rock the component back and forth to release it from the circuit board.
- If necessary, apply fresh solder and heat to the remaining joint to facilitate removal.
- Cleaning the Pads
- Use a desoldering braid or solder wick to remove any remaining solder from the circuit board pads.
- Ensure the pads are clean and free of debris before installing a new component.
- Reworking the Joint
- Follow the soldering technique steps outlined earlier to install the new component or replace the joint.
Tips and Tricks
Here are some additional tips and tricks to help you improve your soldering skills:
- Practice on a spare circuit board or breadboard before working on valuable projects.
- Use a helping hand or circuit board holder to keep the board steady and your hands free.
- Adjust the soldering iron temperature according to the type of solder and component size.
- Keep the soldering iron tip clean and well-tinned for optimal heat transfer.
- Consider using a soldering flux pen or gel for stubborn joints or oxidized components.
- Invest in a quality soldering station with temperature control and a grounded tip for safety.
- Take breaks to prevent fatigue and maintain focus during extended soldering sessions.
Frequently Asked Questions (FAQ)
- What is the difference between lead-free and leaded solder?
- Lead-free solder has a higher melting point and requires higher temperatures for proper flow and wetting.
- Leaded solder (containing lead) has a lower melting point but is generally being phased out due to environmental and health concerns.
- How do I prevent solder bridges between adjacent pads?
- Use a smaller soldering iron tip and apply the solder carefully.
- If a bridge occurs, use desoldering braid or a solder sucker to remove the excess solder.
- Consider using solder mask or liquid tape to protect areas prone to bridging.
- What causes cold solder joints?
- Cold solder joints are caused by insufficient heat transfer, oxidation, or poor flux activity.
- Ensure the soldering iron tip is clean and tinned, and apply adequate heat to the joint during soldering.
- Use fresh solder and flux if necessary.
- How can I improve my soldering speed and efficiency?
- Practice regularly to develop muscle memory and confidence.
- Organize your workspace for efficient component placement and soldering.
- Use helping hands or circuit board holders to keep the board stable.
- Consider investing in a high-quality soldering station with temperature control.
- How do I safely dispose of used solder and components?
- Check with your local waste management authorities for proper disposal guidelines.
- Lead-containing solder and components may require special handling or recycling.
- Use dedicated containers for collecting and separating waste materials.
By following this comprehensive tutorial, you’ll be well on your way to mastering the art of circuit board soldering. Remember to practice regularly, stay organized, and prioritize safety in your workspace. With patience and dedication, you’ll be able to tackle even the most complex soldering projects with confidence.


