Introduction
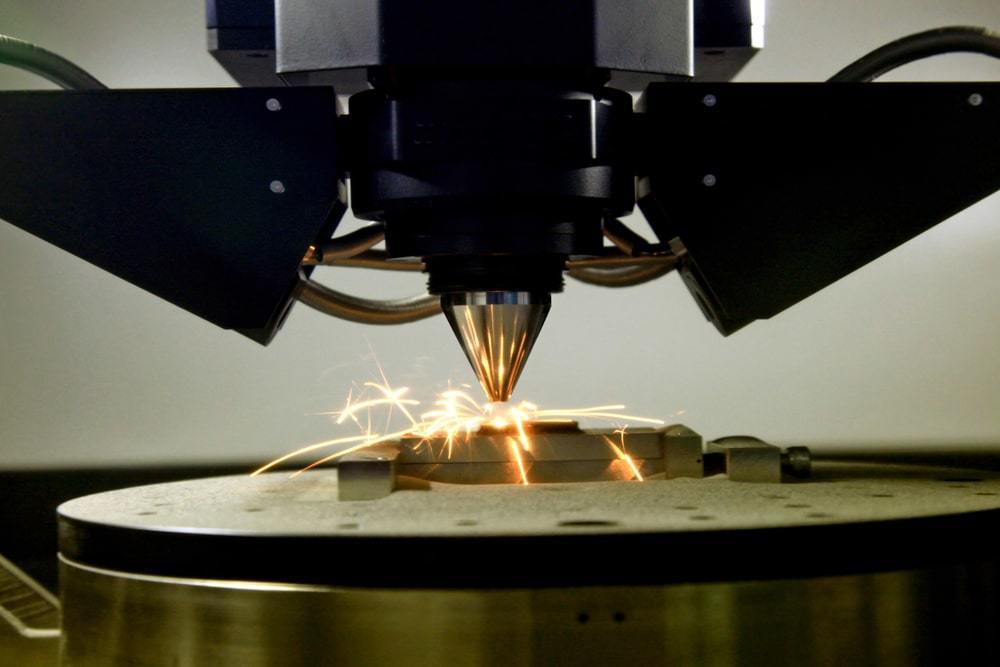
Computer Numerical Control (CNC) milling is a subtractive manufacturing process that uses computer-controlled machining tools to remove material from a workpiece. It is widely used in various industries, including aerospace, automotive, medical, and consumer products, to create complex and precise parts. One of the critical steps in the CNC milling process is preparing the CAD (Computer-Aided Design) model correctly, as it directly impacts the quality and accuracy of the final product.
In this comprehensive article, we will explore tips and best practices for preparing CAD models for CNC milling. We will cover topics such as file formats, design considerations, toolpath generation, and post-processing. By following these guidelines, you can minimize errors, optimize machining time, and ensure the successful production of your parts.
File Formats
h3 1. Native CAD File Formats
Native CAD file formats are the preferred choice for CNC milling because they retain all the design information, including geometry, dimensions, tolerances, and annotations. Some of the most commonly used native CAD file formats include:
.dwg(AutoCAD).sldprt(SolidWorks).iam(Autodesk Inventor).prt(Pro/ENGINEER).catpart(CATIA)
These file formats preserve the parametric nature of the CAD model, allowing for easier modification and updating of the design if required.
h3 2. Neutral File Formats
In some cases, it may be necessary to exchange CAD data between different software platforms or with external vendors. In such situations, neutral file formats can be used. These formats are designed to facilitate data transfer while maintaining the model’s integrity. Some commonly used neutral file formats for CNC milling include:
.step(Step File).iges(Initial Graphics Exchange Specification).stl(Stereolithography)
While neutral file formats are convenient for data exchange, it is important to note that some information may be lost during the conversion process, such as parametric features, annotations, or precise tolerances. Therefore, it is recommended to use native CAD file formats whenever possible.
Design Considerations
h3 1. Model Orientation
The orientation of the CAD model plays a crucial role in determining the efficiency and quality of the CNC milling process. It is essential to orient the model in a way that minimizes the number of setups, reduces toolpath complexity, and optimizes tool access. Consider the following tips:
- Orient the model to minimize the number of sides that need to be machined, as fewer setups can save time and reduce the risk of errors.
- Position the model to allow for the most efficient use of cutting tools, minimizing tool changes and reducing machining time.
- Ensure that critical features are easily accessible to the cutting tool, avoiding deep cavities or tight spaces that may cause tool interference or compromise surface finish.
h3 2. Feature Simplification
Complex CAD models with intricate features can pose challenges during CNC milling, leading to longer machining times, increased tool wear, and potential accuracy issues. To address this, consider simplifying the model by:
- Removing unnecessary details or features that do not contribute to the functionality of the part.
- Combining or merging overlapping or intersecting features to reduce complexity.
- Applying chamfers or fillets to sharp edges to improve tool access and reduce stress concentrations.
h3 3. Draft Angles
Draft angles are crucial in CNC milling, as they facilitate the easy removal of the part from the mold or fixture. Inadequate draft angles can lead to issues such as part sticking, surface damage, or even tool breakage. When preparing your CAD model, consider the following:
- Incorporate appropriate draft angles based on the material and part geometry, typically ranging from 0.5° to 3°.
- Ensure that draft angles are consistently applied throughout the model to avoid undercuts or trapped areas.
- In cases where draft angles are not possible, consider alternative machining strategies or splitting the part into multiple components.
h3 4. Tolerances and Surface Finish
Tolerances and surface finish requirements should be carefully considered during the design phase, as they directly impact the machining process and the final quality of the part. Here are some tips:
- Define realistic tolerances based on the intended application and machining capabilities.
- Specify surface finish requirements for different areas of the part, considering factors such as aesthetics, functionality, and cost.
- Ensure that tolerances and surface finish specifications are clearly communicated and understood by all stakeholders involved in the manufacturing process.
Toolpath Generation
h3 1. CAM Software Selection
The selection of the appropriate CAM (Computer-Aided Manufacturing) software is crucial for generating efficient and accurate toolpaths. CAM software translates the CAD model into machine-readable instructions for the CNC milling machine. Some popular CAM software options include:
- Mastercam
- ESPRIT
- GibbsCAM
- Fusion 360 CAM
- InventorCAM
Consider factors such as software compatibility with your CAD file formats, machining capabilities, post-processing support, and user interface when selecting a CAM software solution.
h3 2. Tool Library and Tool Selection
Proper tool selection is essential for achieving the desired surface finish, minimizing tool wear, and optimizing machining time. Most CAM software packages include comprehensive tool libraries with a wide range of tool types and geometries. When selecting tools, consider the following:
- Choose tools based on the material properties of the workpiece, such as hardness, abrasiveness, and machinability.
- Consider the required surface finish and tolerances when selecting appropriate tool geometry and cutting parameters.
- Optimize tool selection for efficient material removal, while ensuring proper chip evacuation and tool life.
- Utilize tool holders and extensions judiciously to reach difficult areas of the part without compromising rigidity or introducing excessive vibration.
h3 3. Toolpath Simulation and Verification
Before executing the toolpaths on the CNC milling machine, it is crucial to simulate and verify the machining process within the CAM software. Toolpath simulation and verification can help identify potential issues, such as:
- Collisions between the tool and the workpiece or fixtures
- Gouges or excessive material removal
- Inefficient toolpaths or excessive air cutting
- Improper tool engagement or chip thinning
By simulating the toolpaths, you can make necessary adjustments, optimize cutting parameters, and ensure the safety and accuracy of the machining process.
h3 4. Post-Processing
Post-processing is the final step in translating the toolpaths generated by the CAM software into machine-readable G-code. The post-processor is responsible for converting the toolpath data into the specific language and syntax required by the CNC milling machine controller. When post-processing, consider the following:
- Ensure that the post-processor is configured correctly for your specific CNC milling machine, including settings for units, coordinate systems, and control codes.
- Validate the post-processed G-code using a simulation or verification tool to identify any potential errors or inconsistencies.
- Implement post-processor customizations or macro programming to optimize the G-code for specific machining requirements or machine capabilities.
- Regularly update and maintain the post-processor to ensure compatibility with the latest CAM software versions and machine controllers.
FAQs
Q1: Why is proper CAD model preparation important for CNC milling?
A1: Proper CAD model preparation is crucial for CNC milling because it directly impacts the quality, accuracy, and efficiency of the machining process. A well-prepared CAD model ensures that the toolpaths are generated correctly, minimizing errors, reducing machining time, and optimizing tool life. It also helps to avoid potential issues such as collisions, gouges, or excessive material removal, which can lead to costly mistakes or damage to the machine or workpiece.
Q2: What are the common file formats used for CNC milling?
A2: The most commonly used file formats for CNC milling are:
- Native CAD file formats:
.dwg(AutoCAD),.sldprt(SolidWorks),.iam(Autodesk Inventor),.prt(Pro/ENGINEER),.catpart(CATIA) - Neutral file formats:
.step(Step File),.iges(Initial Graphics Exchange Specification),.stl(Stereolithography)
Native CAD file formats are preferred as they retain all design information, while neutral file formats are used for data exchange between different software platforms or vendors.
Q3: How can feature simplification improve CNC milling performance?
A3: Feature simplification can improve CNC milling performance by reducing the complexity of the CAD model. By removing unnecessary details or features, combining overlapping or intersecting features, and applying chamfers or fillets to sharp edges, the toolpaths become simpler and more efficient. This can lead to shorter machining times, reduced tool wear, and improved surface finish quality.
Q4: What is the importance of draft angles in CNC milling?
A4: Draft angles are crucial in CNC milling as they facilitate the easy removal of the part from the mold or fixture. Inadequate draft angles can lead to issues such as part sticking, surface damage, or even tool breakage. Incorporating appropriate draft angles, typically ranging from 0.5° to 3°, helps ensure successful and efficient part removal without damaging the workpiece or the milling tools.
Q5: How can toolpath simulation and verification help in CNC milling?
A5: Toolpath simulation and verification within the CAM software can help identify potential issues before executing the toolpaths on the CNC milling machine. It allows you to detect collisions between the tool and the workpiece or fixtures, identify gouges or excessive material removal, identify inefficient toolpaths or excessive air cutting, and ensure proper tool engagement and chip thinning. By simulating and verifying the toolpaths, you can make necessary adjustments, optimize cutting parameters, and ensure the safety and accuracy of the machining process.


