Introduction
In today’s fast-paced world, waking up on time is crucial, and an alarm clock has become an indispensable part of our daily routine. However, the traditional beeping sound of an alarm clock can be jarring and unpleasant, leaving us groggy and disoriented. Fortunately, with the advent of digital technology, we can now create an alarm clock that plays our favorite music or audio files, making the process of waking up a more pleasant and enjoyable experience.
This article will guide you through the process of building an MP3 Alarm Clock using an Arduino board and a DFPlayer module. We’ll cover everything from the required components to the code implementation, ensuring that you have a comprehensive understanding of the project.
Components Required
Before we dive into the project, let’s take a look at the components you’ll need:
Hardware Components
- Arduino Board: We’ll be using an Arduino Uno or any compatible Arduino board for this project.
- DFPlayer Mini MP3 Module: This module allows us to play MP3 files from a microSD card or USB drive.
- MicroSD Card: You’ll need a microSD card to store the MP3 files you want to play as your alarm sound.
- Speaker or Headphones: To hear the audio output from the DFPlayer module.
- Breadboard: A breadboard is a convenient way to connect the electronic components without soldering.
- Jumper Wires: These are used to connect the components on the breadboard.
- Push Button: We’ll use a push button as a manual alarm stop/snooze button.
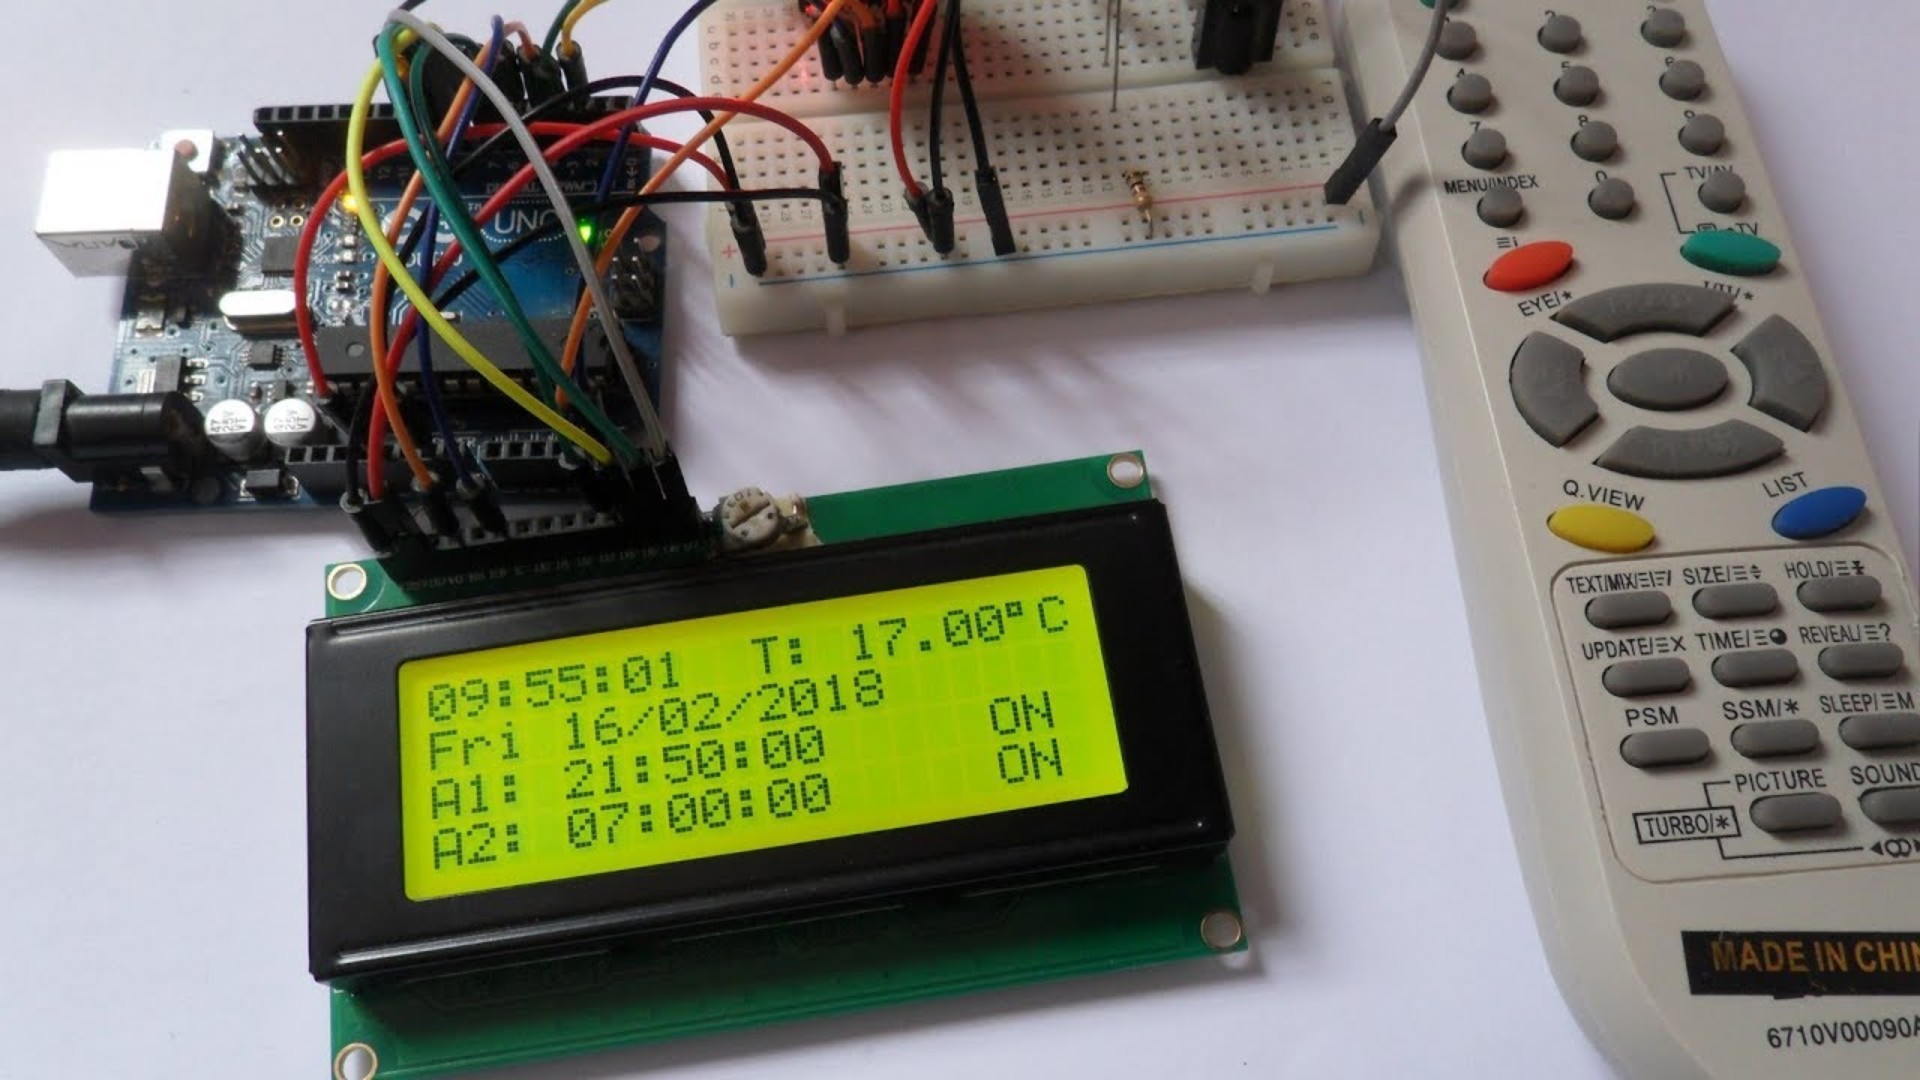
- LCD Display (Optional): An LCD display can be added to show the current time and alarm status.
- Real-Time Clock (RTC) Module (Optional): If you want to keep accurate time, you can add an RTC module to your project.
Software Requirements
- Arduino IDE: We’ll be using the Arduino Integrated Development Environment (IDE) to write and upload the code to the Arduino board.
- DFPlayer Library: This is a library specifically designed to work with the DFPlayer module. You’ll need to install it in the Arduino IDE.
Setting up the Hardware
Step 1: Connect the DFPlayer Module to the Arduino
Connect the DFPlayer module to the Arduino board using the following pin connections:
- DFPlayer RX pin to Arduino TX pin (usually pin 1)
- DFPlayer TX pin to Arduino RX pin (usually pin 0)
- DFPlayer VCC pin to Arduino 5V pin
- DFPlayer GND pin to Arduino GND pin
Step 2: Connect the Speaker or Headphones
Connect the speaker or headphones to the DFPlayer module’s speaker output pins. You may need to use a small amplifier or audio jack, depending on the type of speaker or headphones you’re using.
Step 3: Connect the Push Button
Connect one side of the push button to an Arduino digital input pin (e.g., pin 2) and the other side to the Arduino GND pin. You’ll also need to connect a pull-up or pull-down resistor (e.g., 10K ohm) between the digital input pin and the appropriate voltage (5V or GND) to ensure a stable signal.
Step 4: Connect the LCD Display (Optional)
If you’re using an LCD display, follow the specific wiring instructions for your LCD module. Typically, you’ll need to connect the LCD’s data pins to the Arduino’s digital pins, as well as the power and ground pins.
Step 5: Connect the RTC Module (Optional)
If you’re using an RTC module, follow the specific wiring instructions for your module. Typically, you’ll need to connect the RTC’s data pins to the Arduino’s I2C pins (SDA and SCL), as well as the power and ground pins.
Setting up the Software
Step 1: Install the DFPlayer Library
- Open the Arduino IDE.
- Go to
Sketch>Include Library>Manage Libraries. - Search for “DFPlayer” and install the latest version of the library.
Step 2: Write the Arduino Code
Here’s an example Arduino code that you can use as a starting point for your MP3 Alarm Clock project:
This code sets an alarm for 7:00 AM and plays an MP3 file from the microSD card when the alarm time is reached. You can adjust the alarmHour and alarmMinute variables to set the desired alarm time. The ALARM_BUTTON pin is used to manually stop the alarm sound.
Make sure to upload this code to your Arduino board after making any necessary modifications.
Adding Additional Features
The above code provides a basic implementation of an MP3 Alarm Clock. However, you can add more features and functionality to enhance the user experience. Here are some ideas:
1. Real-Time Clock (RTC)
Instead of using the Arduino’s built-in timer, which may drift over time, you can integrate a Real-Time Clock (RTC) module to keep accurate time. This will ensure that your alarm clock remains synchronized with the actual time.
2. LCD Display
Add an LCD display to show the current time, alarm time, and other relevant information. This will make it easier for the user to set and monitor the alarm.
3. Snooze Function
Implement a snooze function that allows the user to temporarily stop the alarm sound and have it resume after a predetermined time (e.g., 5 or 10 minutes).
4. Multiple Alarms
Add the ability to set multiple alarms with different times and alarm sounds.
5. Alarm Settings Menu
Create a menu system using the LCD display and buttons to allow the user to easily set the alarm time, choose the alarm sound, and adjust other settings.
6. Sleep Timer
Implement a sleep timer feature that automatically stops the audio playback after a specified duration, allowing the user to fall asleep while listening to music or audio files.
7. Wireless Connectivity
Integrate wireless connectivity (e.g., Wi-Fi or Bluetooth) to allow the user to control the alarm clock using a smartphone app or a web interface.
These are just a few ideas to get you started. Feel free to explore and implement additional features based on your needs and creativity.
Frequently Asked Questions (FAQ)

1. What is the purpose of the DFPlayer module?
The DFPlayer module is a compact and powerful audio player designed specifically for Arduino and other microcontroller projects. It allows you to play MP3 and WAV audio files directly from a microSD card or USB drive, making it an ideal choice for creating audio-based projects like MP3 alarm clocks, audio guides, or music players.
2. How do I add my own MP3 files to the microSD card?
To add your own MP3 files to the microSD card, you’ll need to follow these steps:
- Format the microSD card using the FAT32 or FAT16 file system.
- Create a folder named “mp3” (without quotes) on the microSD card.
- Copy your MP3 files into the “mp3” folder.
- Insert the microSD card into the DFPlayer module’s microSD card slot.
In the Arduino code, you’ll need to specify the track number (starting from 1) of the MP3 file you want to play as the alarm sound.
3. Can I use other audio formats besides MP3?
The DFPlayer module supports various audio formats, including MP3, WAV, AAC, WMA, FLAC, and APE. However, it’s important to note that not all DFPlayer modules support all of these formats. Check the documentation or specifications of your specific DFPlayer module to determine the supported audio formats.
4. How can I adjust the volume of the alarm sound?
The DFPlayer module has a built-in volume control feature. You can use the dfPlayer.volumeUp() and dfPlayer.volumeDown() functions in your Arduino code to increase or decrease the volume, respectively.
5. Can I use a different Arduino board or microcontroller?
Yes, you can use other Arduino boards or microcontrollers compatible with the Arduino IDE and the DFPlayer library. The basic principles and code structure will remain the same, but you may need to adjust the pin assignments and configurations based on your specific board or microcontroller.
Conclusion
Building an MP3 Alarm Clock using an Arduino and DFPlayer module is a fun and rewarding project that combines electronics, programming, and audio playback. By following the steps outlined in this article, you’ll be able to create a customized alarm clock that plays your favorite music or audio files, making your mornings more enjoyable.
Remember, this project is just the starting point, and you can further enhance it by adding additional features like an LCD display, snooze function, multiple alarms, and wireless connectivity. Experiment, explore, and let your creativity shine!
Happy building!


