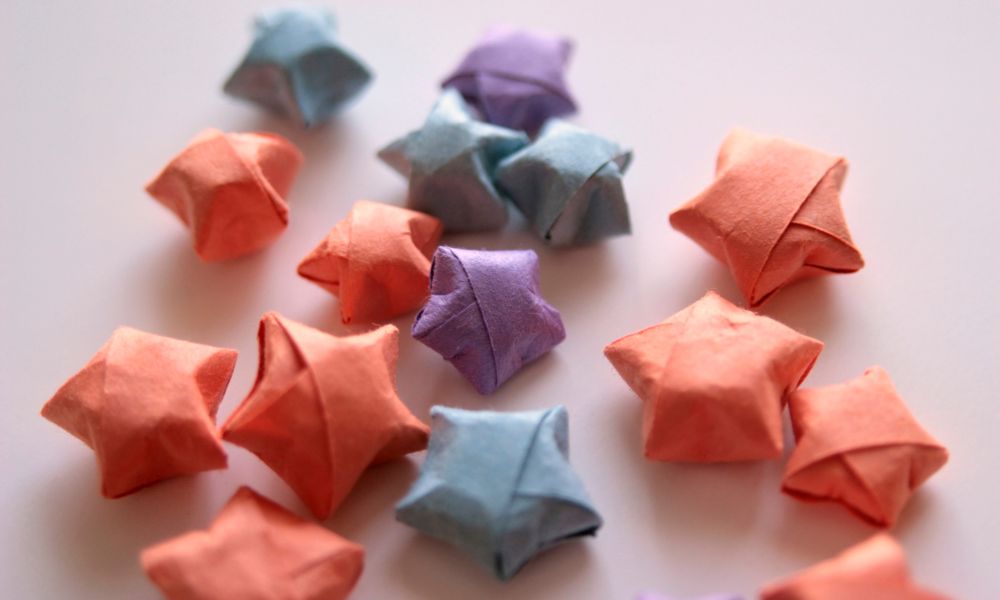
Making 3D paper stars is a fun and easy craft project that can be enjoyed by people of all ages. Whether you’re looking to decorate your home or create unique ornaments for the holidays, 3D paper stars are a great way to add a touch of creativity to your space. With just a few simple materials and some basic folding techniques, you can create stunning paper stars that are sure to impress.
To get started, all you need is some paper, scissors, and glue. There are many different methods for making 3D paper stars, but one of the most popular and straightforward techniques involves folding a square piece of paper into a pentagon shape and then folding the sides to create the star’s points. You can also experiment with different paper sizes and colors to create a variety of unique designs. Whether you’re a beginner or an experienced paper crafter, making 3D paper stars is a great way to explore your creativity and have some fun.
Materials
When it comes to making 3D paper stars, the right materials can make all the difference. Here are the essential items you’ll need to get started:
Paper
The most important material for making 3D paper stars is, of course, paper! You’ll want to choose a sturdy type of paper that can hold its shape when folded and won’t tear easily. Some good options include:
- Craft paper
- Origami paper
- Construction paper
You can choose any color or pattern you like, but keep in mind that lighter colors may show creases more easily than darker colors.
Scissors
Another essential tool for making 3D paper stars is a pair of scissors. You’ll need them to cut your paper into the right size and shape, as well as to trim any excess paper from your finished stars.
When choosing scissors, look for a pair that feels comfortable in your hand and has sharp blades that can cut through paper cleanly.
Glue
Finally, you’ll need some glue to hold your paper stars together. There are many different types of glue that can work for this project, including:
- Craft glue
- Glue sticks
- Double-sided tape
Choose the type of glue that works best for you, but keep in mind that some types may dry faster or hold stronger than others.
Overall, with the right paper, scissors, and glue, you’ll be well on your way to making beautiful 3D paper stars that you can use for decorations, gifts, or just for fun!
Preparation
Before starting to make 3D paper stars, it is essential to prepare the necessary tools and materials. The following subsections will guide you through the preparation process.
Cutting the Paper
Firstly, select the paper you want to use for your 3D paper stars. You can use any type of paper, but it is recommended to use craft paper as it is easy to fold and manipulate. Once you have selected your paper, cut it into a square shape. You can use a ruler to measure the paper’s dimensions and cut it accordingly.
It is important to note that the size of the paper will determine the size of the 3D paper star. If you want to make a larger star, use a larger piece of paper. Similarly, if you want to make a smaller star, use a smaller piece of paper.
Once you have cut the paper into a square shape, you can proceed to the next step of making 3D paper stars.
Instructions
Making 3D paper stars is a fun and easy craft project that can be enjoyed by people of all ages. Follow these simple steps to create your own beautiful stars!
Step 1: Folding the Paper
To begin, take a square piece of paper and fold it in half diagonally, creasing it well. Then, fold it in half diagonally again in the opposite direction, creasing it well once more. Unfold the paper, and you should have four creases forming an “X” on the paper.
Next, fold the paper in half horizontally and vertically, creasing it well each time. Unfold the paper, and you should have eight creases forming a grid on the paper.
Step 2: Creating the Points
Now it’s time to create the points of the star. Cut along the horizontal and vertical creases from the edge of the paper to the first intersection of the creases. You should have four cuts, each one quarter of the length of the paper.
Fold the paper in half diagonally, bringing two opposite corners together. Pinch the folded edge together at the center of the paper, creating a crease. Then, fold the paper in half diagonally again, bringing the other two opposite corners together. Pinch the folded edge together at the center of the paper, creating another crease.
Unfold the paper, and you should have a star shape with four points.
Step 3: Assembling the Star
To assemble the star, fold each point along the diagonal crease, bringing the two edges together. Apply glue or double-sided tape to the folded edge, and press it down onto the adjacent point, creating a three-dimensional star shape.
Repeat this process for each of the five points, gluing them together until the star is complete.
Congratulations, you have created a beautiful 3D paper star!
Variations
There are many ways to customize your 3D paper stars, from using different paper types to adding glitter or paint. Here are a few ideas to get you started:
Using Different Paper Types
Experimenting with different paper types can give your 3D paper stars a unique look. You can use patterned paper, metallic paper, or even wrapping paper to create stars that match the theme of your event or decor. You can also use different weights of paper to make your stars sturdier or more delicate. Here are some paper types to consider:
- Patterned paper
- Metallic paper
- Wrapping paper
- Tissue paper
- Cardstock
- Vellum
- Origami paper
Adding Glitter or Paint
Adding glitter or paint to your 3D paper stars can give them extra sparkle and shine. You can use glitter glue or loose glitter to add a touch of glamour to your stars. You can also use paint to create a gradient effect or to add texture. Here are some tips for adding glitter or paint:
- Apply glitter glue or loose glitter to the edges of your stars for a subtle effect.
- Use a paintbrush to apply paint to the tips of the star points for a gradient effect.
- Use a sponge to dab paint onto the surface of the star for a textured effect.
Remember to let your stars dry completely before handling them to avoid smudging or smearing the glitter or paint.
With these variations, you can create a variety of unique 3D paper stars that will add a special touch to any occasion.
Tips and Tricks
Making Consistent Folds
To make 3D paper stars, it is important to make consistent folds. You can do this by using a bone folder to create crisp, sharp creases. Additionally, you can use a ruler or straight edge to ensure that your folds are straight and even. This will help you create a more polished and professional-looking finished product.
Another helpful tip is to use a scoring tool to create your folds. This will help you create precise creases without tearing or damaging your paper.
Using a Ruler for Precision
If you want to create 3D paper stars that are perfectly symmetrical and evenly sized, using a ruler can be very helpful. You can use a ruler to measure and mark your paper before making your folds, ensuring that each fold is the same size and in the right place.
Additionally, using a ruler can help you create precise angles and shapes when cutting your paper. This is especially important if you want to create stars with more complex shapes and designs.
Other Tips and Tricks
- Use lightweight paper for easier folding and shaping.
- Experiment with different colors and patterns to create unique and personalized stars.
- Practice on scrap paper before working with your final materials.
- Be patient and take your time when making folds and cuts.
- Use glue sparingly to avoid making a mess or warping your paper.
By following these tips and tricks, you can create beautiful and intricate 3D paper stars with ease and precision.
Resouces:
https://www.thesprucecrafts.com/3d-folded-paper-star-tutorial-2905535
https://www.thecraftaholicwitch.com/how-to-make-3d-paper-stars/