Designing 3D print models is an exciting and creative process that has become increasingly accessible to people with different backgrounds and skill levels. With the right tools and techniques, anyone can turn their ideas into tangible objects that can be used for various purposes, from art and education to engineering and manufacturing. However, designing 3D print models requires some knowledge of the principles of 3D modeling, as well as the specific requirements of 3D printing technology.
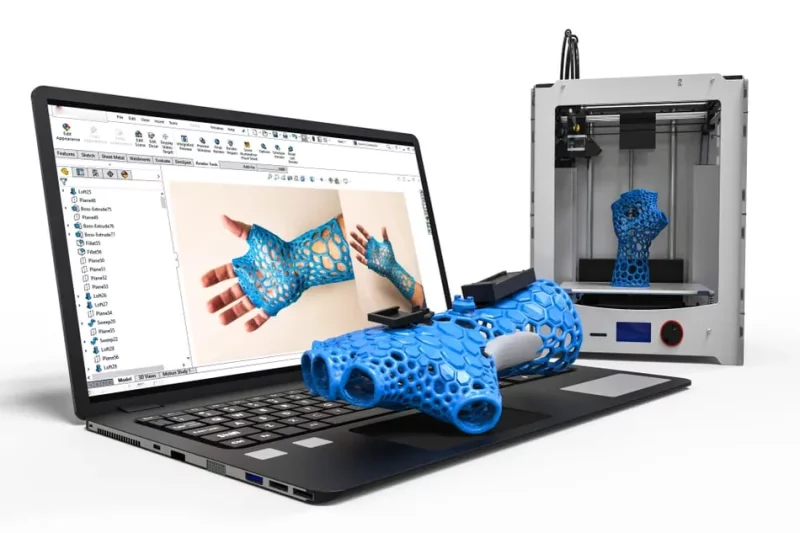
One of the first steps in designing 3D print models is to choose a suitable 3D modeling software that fits your needs and preferences. There are many options available, ranging from free and open-source software like Blender and Tinkercad to more advanced and specialized software like Autodesk Fusion 360 and SolidWorks. Each software has its own strengths and weaknesses, and it’s important to choose the one that matches your level of expertise, your project requirements, and your budget. Once you have chosen a software, you can start learning the basics of 3D modeling, such as creating shapes, manipulating vertices, and applying textures and colors. It’s also important to understand the different file formats used in 3D modeling and 3D printing, such as STL, OBJ, and AMF, and how to export your models in the correct format for your printer.
Another important aspect of designing 3D print models is to consider the physical properties and limitations of 3D printing technology. Unlike traditional manufacturing methods, 3D printing relies on layer-by-layer deposition of materials, which can affect the strength, accuracy, and surface finish of your models. Therefore, it’s important to design your models with certain guidelines in mind, such as avoiding overhangs, designing with support structures, and optimizing the orientation and slicing of your models. By following these guidelines, you can ensure that your 3D print models are not only aesthetically pleasing but also functional and durable.
Understanding 3D Printing
What is 3D Printing?
3D printing is a process of creating three-dimensional objects from a digital file. The process involves building the object layer by layer until the final product is complete. The digital file is created using 3D modeling software, which can be designed from scratch or by using pre-existing designs.
Types of 3D Printers
There are several types of 3D printers available, each with its own advantages and disadvantages. The most common types of 3D printers include:
- Fused Deposition Modeling (FDM): This type of printer melts plastic filament and extrudes it layer by layer to create the object.
- Stereolithography (SLA): This type of printer uses a liquid resin that is cured by a UV laser to create the object.
- Selective Laser Sintering (SLS): This type of printer uses a laser to sinter powdered material, such as metal or plastic, to create the object.
Materials Used in 3D Printing
There are a variety of materials that can be used in 3D printing, each with its own unique properties. Some of the most common materials used in 3D printing include:
- PLA (Polylactic Acid): A biodegradable plastic that is easy to print with and produces minimal fumes.
- ABS (Acrylonitrile Butadiene Styrene): A strong and durable plastic that is commonly used in household items.
- Nylon: A strong and flexible material that is commonly used in industrial applications.
- Metal: A variety of metals can be used in 3D printing, including titanium, aluminum, and stainless steel.
In conclusion, understanding the basics of 3D printing is essential for designing successful 3D print models. Knowing the types of printers and materials available will help you make informed decisions when creating your digital designs.
Designing 3D Print Models
Designing 3D print models can be a fun and rewarding experience, but it can also be challenging for beginners. In this section, we will cover the basics of designing 3D print models, including choosing a 3D modeling software, creating 3D models, and optimizing 3D models for printing.
Choosing a 3D Modeling Software
The first step in designing a 3D print model is to choose a 3D modeling software. There are many different options available, ranging from beginner-friendly software like Tinkercad to more advanced software like Blender and Fusion 360.
When choosing a 3D modeling software, consider the following factors:
- Ease of use: Is the software user-friendly and easy to learn?
- Features: Does the software have the features you need for your project?
- Compatibility: Is the software compatible with your 3D printer and file format?
Creating 3D Models
Once you have chosen a 3D modeling software, it’s time to start creating your 3D model. The process will vary depending on the software you are using, but generally involves the following steps:
- Sketch or import your design: Start by sketching your design or importing a 2D or 3D file into the software.
- Extrude and manipulate shapes: Use the software’s tools to extrude and manipulate shapes to create your 3D model.
- Add details and textures: Add details and textures to your model to make it more visually appealing.
Optimizing 3D Models for Printing
After you have created your 3D model, it’s important to optimize it for printing. This involves ensuring that the model is printable and will produce a high-quality print. Here are some tips for optimizing your 3D model for printing:
- Check for errors: Use a software like Meshmixer to check for errors in your model, such as non-manifold edges or intersecting faces.
- Consider print orientation: Choose the best print orientation for your model to ensure that it prints correctly and with minimal support material.
- Adjust settings: Adjust your printer settings, such as layer height and infill density, to achieve the best print quality.
In conclusion, designing 3D print models requires choosing a 3D modeling software, creating 3D models, and optimizing 3D models for printing. By following these basic steps and considering the factors mentioned above, you can create high-quality 3D print models that are both functional and visually appealing.
Preparing for 3D Printing
Before printing a 3D model, it is essential to prepare it for printing. This process involves slicing the model, choosing print settings, and calibrating the 3D printer. Here are some tips to help you prepare your 3D prints successfully.
Slicing 3D Models
Slicing is the process of dividing a 3D model into a series of 2D layers. This process is necessary because 3D printers can only print one layer at a time. Slicing software allows you to specify the layer thickness, print speed, and other settings that affect the quality of the print.
When slicing a 3D model, consider the following:
- Layer thickness: The layer thickness determines the print resolution. Thinner layers produce higher quality prints, but they also take longer to print.
- Infill density: Infill is the internal structure of the print. Higher infill density results in a stronger print, but it also takes longer to print.
- Support material: Support material is used to print overhanging parts of the model. It is essential to enable support material for models with overhangs to ensure that the print is successful.
Choosing Print Settings
Choosing the right print settings is crucial to getting a high-quality print. Here are some settings to consider:
- Print temperature: The print temperature determines how hot the extruder nozzle is. Different materials require different print temperatures, so check the manufacturer’s recommendations.
- Print speed: Print speed affects the quality of the print. Slower speeds produce higher quality prints, but they also take longer to print.
- Bed temperature: The bed temperature determines how hot the build plate is. Again, different materials require different bed temperatures, so check the manufacturer’s recommendations.
Calibrating the 3D Printer
Calibrating the 3D printer is essential to ensure that the print is successful. Here are some calibration tips:
- Level the bed: The bed must be level to ensure that the print adheres to the build plate properly.
- Check the extruder: The extruder must be calibrated to ensure that the right amount of filament is being extruded.
- Check the flow rate: The flow rate determines how much filament is being extruded. It must be calibrated to ensure that the print is successful.
In conclusion, preparing a 3D model for printing requires careful consideration of several factors. Slicing the model, choosing the right print settings, and calibrating the 3D printer are all essential steps to ensure a successful print. By following these tips, you can create high-quality 3D prints that meet your needs.
Printing Your 3D Model
Once you have designed your 3D model and sliced it into printable layers, you are ready to print it. Here are the steps to follow:
Loading the Filament
Before starting the print, you need to load the filament into the 3D printer. This is done by inserting the filament spool into the printer and feeding the end of the filament into the extruder. Once the filament is in the extruder, you need to heat the extruder to the temperature specified for the type of filament you are using. This will melt the filament and allow it to flow through the extruder nozzle.
Starting the Print
Once the extruder is heated, you can start the print. This is done by selecting the print file on the printer’s interface and pressing the print button. The printer will then start to print the first layer of your model. It is important to monitor the print during the first few layers to ensure that the filament is sticking properly to the print bed. If it is not, you may need to adjust the print bed height or temperature.
Post-Processing the Print
Once the print is complete, you need to remove the model from the print bed and clean it up. This involves removing any support structures that were printed along with the model, as well as any excess filament that may be sticking out. You can use a variety of tools to do this, including pliers, wire cutters, and sandpaper.
After the model has been cleaned up, you may need to do some additional post-processing to achieve the desired finish. This can include sanding, painting, or applying a protective coating. The specific post-processing steps will depend on the type of model you are printing and the desired end result.
Overall, printing a 3D model requires careful attention to detail and a willingness to experiment and adjust as needed. With practice and patience, however, you can create high-quality, functional models that are sure to impress.
How to create Models for 3D Printing (STL Files): Full Guide!
https://www.wevolver.com/article/how-to-make-a-3d-model-for-printing
https://www.shapr3d.com/blog/design-for-3d-printing
https://formlabs.com/blog/modeling-3d-printing-tips-jeremy-ortiz/